I
love Tim Holtz’s July tag! The AMERICANA Cling
Stamps are so versatile and a must have for vacation, military, and July 4th
celebration scrapbook layouts and projects. This tag is being used on a photo
album page as a double sided flip photo.
supplies:
•surfaces:
#8 manila tag, distress watercolor cardstock, paper stash/lost & found,
transparency film
•stamp:
THMB006•embellishments: crinkle ribbon, loop pin, traditions trinket, remnant rubs/special delivery
•distress ink: fired brick, faded jeans, hickory smoke
•distress markers: fired brick, festive berries, chipped sapphire, faded jeans, pumice stone, black soot
•inks: jet black archival ink
•tools: distress micro-glaze, distress marker spritzer, sanding grip, tonic shears, waterbrush/detailer, waterbrush/flat, heat tool, remnant rub tool, ruler, mini ink blending tool, hole punch, scoreboard, bone folder
•adhesive: scotch quick-dry adhesive, double sided tap
·
For
a double sided tag, draw around the tag on the back of patterned paper and cut
out the tag shape. This will be used later.
·
Adhere
a tag to the back of a different piece of patterned paper.
·
To
add a hinge to the tag for attaching to a project:
Draw a line 1/2 inch past the edge of the tag on the side
you would like to attach to the project. Cut on the drawn line and along the other 3
edges of the tag. Score along the tag and 1/8” from the tag edge. Fold and
burnish to create hinge.
·
Punch
a hole through the top of the tag. Glue the previously cut paper to the back of
the tag and punch the hole. Sand the edges (not the hinge edge) for a
distressed look
·
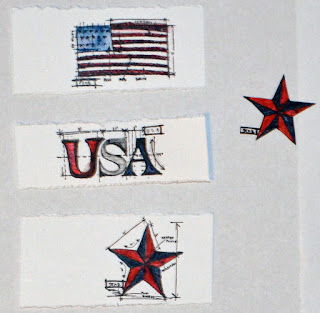
Stamp
the images on distress watercolor cardstock with permanent ink. I stamped an
extra star to layer over the star image.
·
Using
the edge of a ruler, tear the top and bottom edges of each stamped image.
·
Color
the stamped images (you can use the waterbrush to blend colors) and dry with a
heat tool.
·
Apply
a small amount of distress micro-glaze over all colored images and rub off
excess with a dry paper towel. This seals the color creating a resist.
·
Apply
distress ink or stain to the craft sheet. Use the flat waterbrush to color
directly over the entire stamped image and dry with the heat tool.
·
Ink
the edges with frayed burlap using mini blending tool and adhere to the tag (If
you added the hinge fold it back before adhering).
·
Cut
excess paper from the tag being careful not to cut the hinge. Ink all the
edges.
·
Use
a sewing machine to sew around the tag edges (make sure hinge is straight out
so you don’t sew it closed)
·
Using
the distress marker spritzer, spritz black soot marker over the tag
·
Tape
a piece of crinkle ribbon to your craft sheet. Using a distress marker color
one edge blue and one edge red leaving the center white. Mist ribbon with water
to blend color, dry with heat tool and crinkle ribbon.
·
Add
ribbon, loop pin and embellishment through the hole in the tag.
Add finishing embellishments and apply a remnant rub using a remnant rub tool. The ship was printed on transparency film, trimmed and adhered with scotch quick-dry adhesive. The pictures were placed and the additional stamped star was placed over the picture aligned with originally stamped star. Finish the back side of the tag, apply double sided tape to the hinge and add it to your project.


LOVE the addition of the photos. Cool take! Congrats on your win!
ReplyDeleteGreat tag! Love how you made it yours!
ReplyDeleteGreat tag and great tutorial! Congratulations on your win!
ReplyDeleteI love it, great work, congrats on your win
ReplyDeleteI love the personalized version of Tim's tag!! the tutorial is awesome! Congratulations!!
ReplyDeleteCongrats on your win! Such a cute take on Tim's Tag...LOVE the added photos...so patriotic!
ReplyDeleteHi Sue!! LOVE your patriotic take-with photos-on Tim's tag! Congrats on your win!! XOXO-Shari
ReplyDeleteLove how you have added photos to your tag....congrats on your win!
ReplyDeleteGreat idea to add a photo! Congrats on your win!
ReplyDelete~~~julia~~~
Great idea to use tag as a flip photo page. Congratulations on your Tim July tag win!
ReplyDeleteReally love your tag! Using my Tim Tags to document 2015 for my daughter's Jr/Sr years of HS. Love the personal touch.
ReplyDelete